Exporting a form to a branded web app
In this article, we will export our form into a branded web application. We will explore the different options available while exporting to a web app and see how we can brand it to our requirements. Let's dive in!
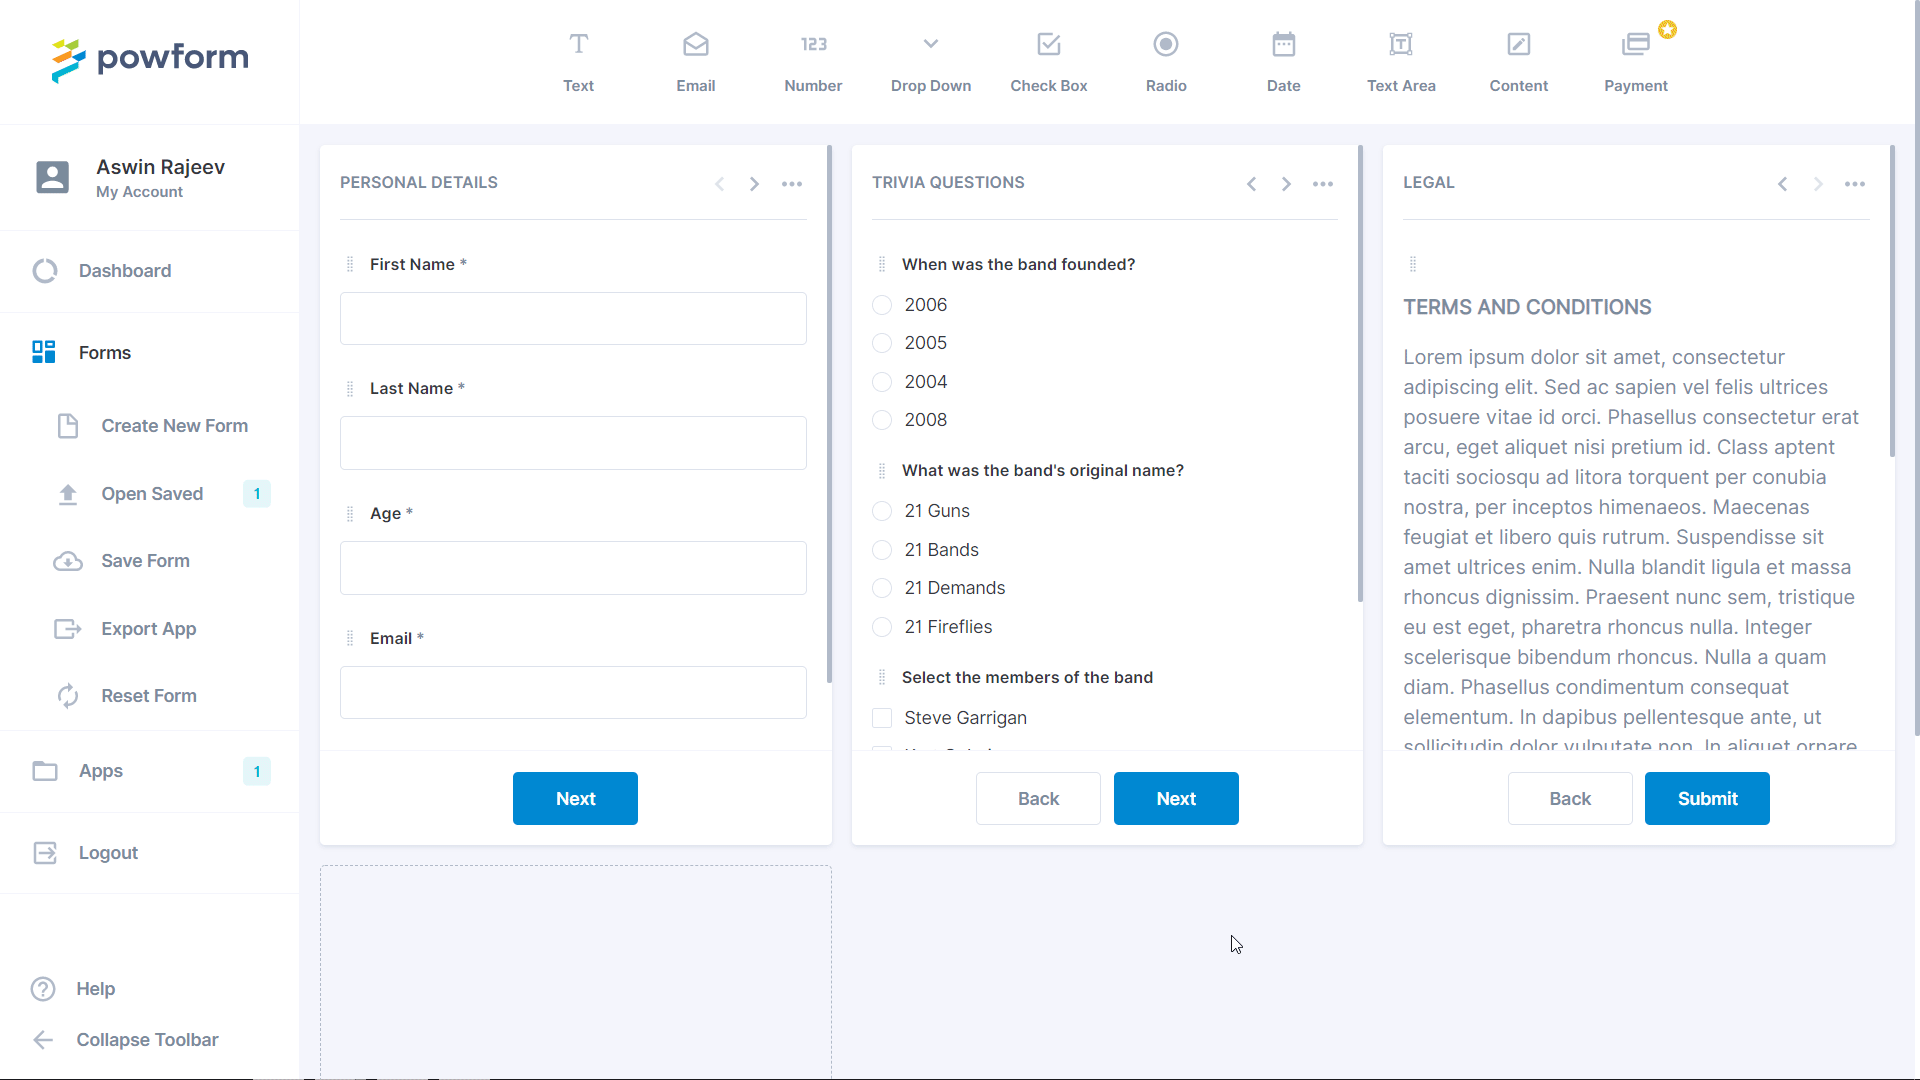
Form exporting options
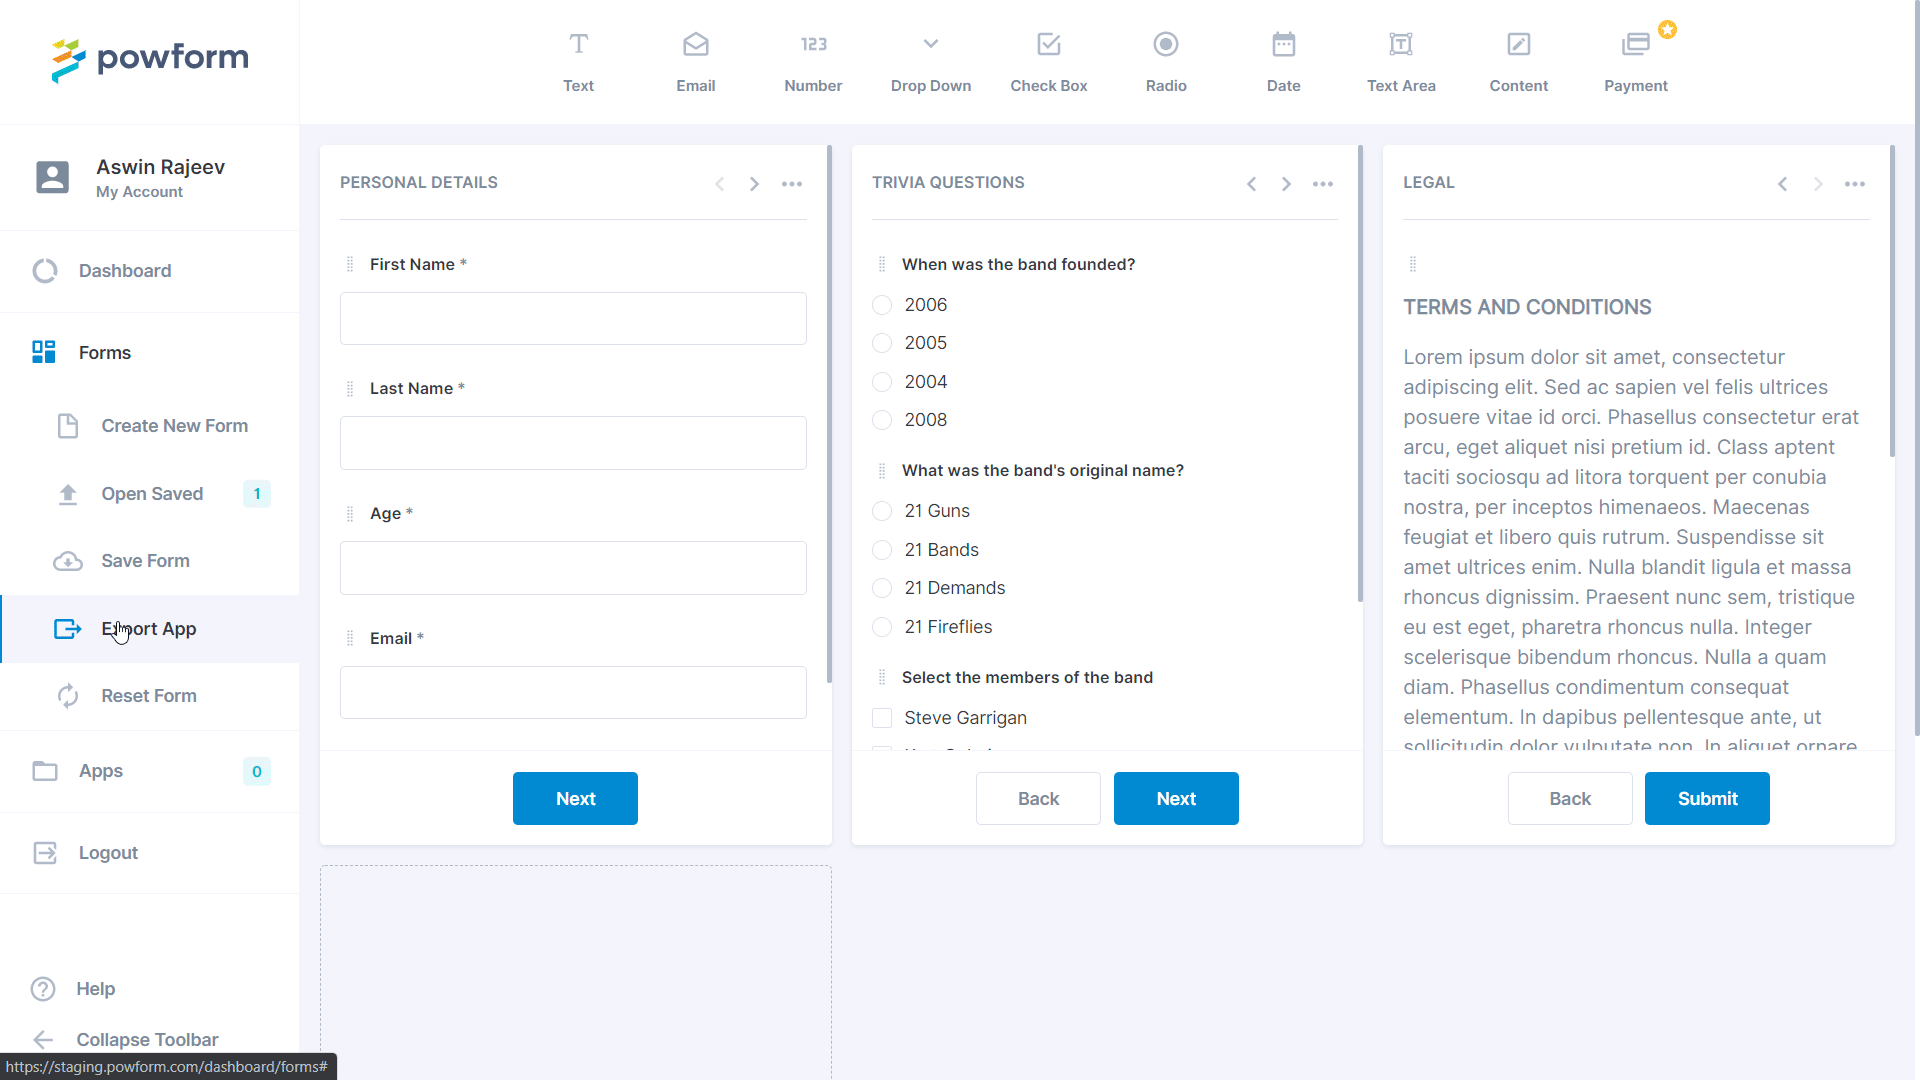
As soon as you save your form, a new option will be unlocked on the left side menu called ‘Export App’. Clicking on this will open up a new dialogue box, with three tabs. The default tab is for the App Info, where you can set a name for your application, a description, and also a logo. The next tab is a very important one in terms of branding, and it allows you to choose the primary and secondary colours for your application.
In a web application context, the primary colour is used across all the major components across all the screens. The secondary colour is not always necessary, but it allows you to highlight certain key components and interactions.
The last tab is for users. This is also another crucial part of exporting an app in PowForm. The user tab has two options, one is for assigning individual users and the other is to set the app to be anonymous, wherein anyone with access to the app URL can use the app. More on this will be discussed in the subsequent sections.
Branding – Why is it important?
PowForm gives a strong emphasis on branding your form-based web application, and there is a good reason for it. The colour palette of an application has a strong effect on the user experience. Research by Colorcom found that it takes merely 90 seconds for a customer to make a judgment subconsciously about a product. But wait, that can be based on a lot of factors, right? No. The study also found that between 62-90% of the subconscious judgment is based on colour alone.
PowForm lets you choose a logo and the primary and secondary colours for your branded form-based web app, and instantly uses the colour everywhere in the app. It even gives a small preview while choosing the colours to help you choose the best option for your app.
Specific Users vs Anonymous Users
The last tab in the exporting dialogue box allows the app to be viewed by specific users or viewed by anyone that has the URL. This is a very neat feature because, for applications that need to be sent out on an individual basis (like only the employees in a company), it can be done by assigning app instances to individuals via email address. Doing so will result in a unique URL being sent to each of the employees to access the application.
This allows the app to be more of a personal service to the user and can also reduce the amount of information required to be entered into the app since you know who it’s coming from. An expiry time is also associated with this URL that will cut off access after the specified time. For this example, we will be setting it to anonymous so that we can access it later anytime through the URL.
Apps Listing
The side menu has an ‘Apps’ option that will have its count as ‘1’ from ‘0’ once we save our first app. Let’s open up this page and take a look at the options present inside it.
For now, we just have a single app. Look how the logo of the app is nicely placed along with the name. If we click on the app name, we will be presented with multiple options. Additionally, there’s a ‘+’ button on the left-hand side that will expand the options as well. Since we set it to be anonymous, we can see that in the expanded information along with the app expiry date. The default app expiry date is 3 weeks, but this is of course, editable with the date picker. The next section shows the status as active or inactive, and the section after that shows the number of submissions that have been made.
Further down, there are two more options. The ‘Add Users’ button allows adding specific users with their email addresses and an expiry time. The other option is ‘In-App Messaging’. This allows presenting the user with informational messages depending on the status of the application. We can decide on the message that is to be presented to the user, if the app is inactive, expired or if the submission limit has been exceeded.
Towards the right end, there are two buttons. One is to copy the URL of the application and the other is to delete the user. The app can be deleted by selecting it with the checkbox on the left-hand side and clicking on the ‘Delete Apps’ button in the bottom right corner.
Wrapping up
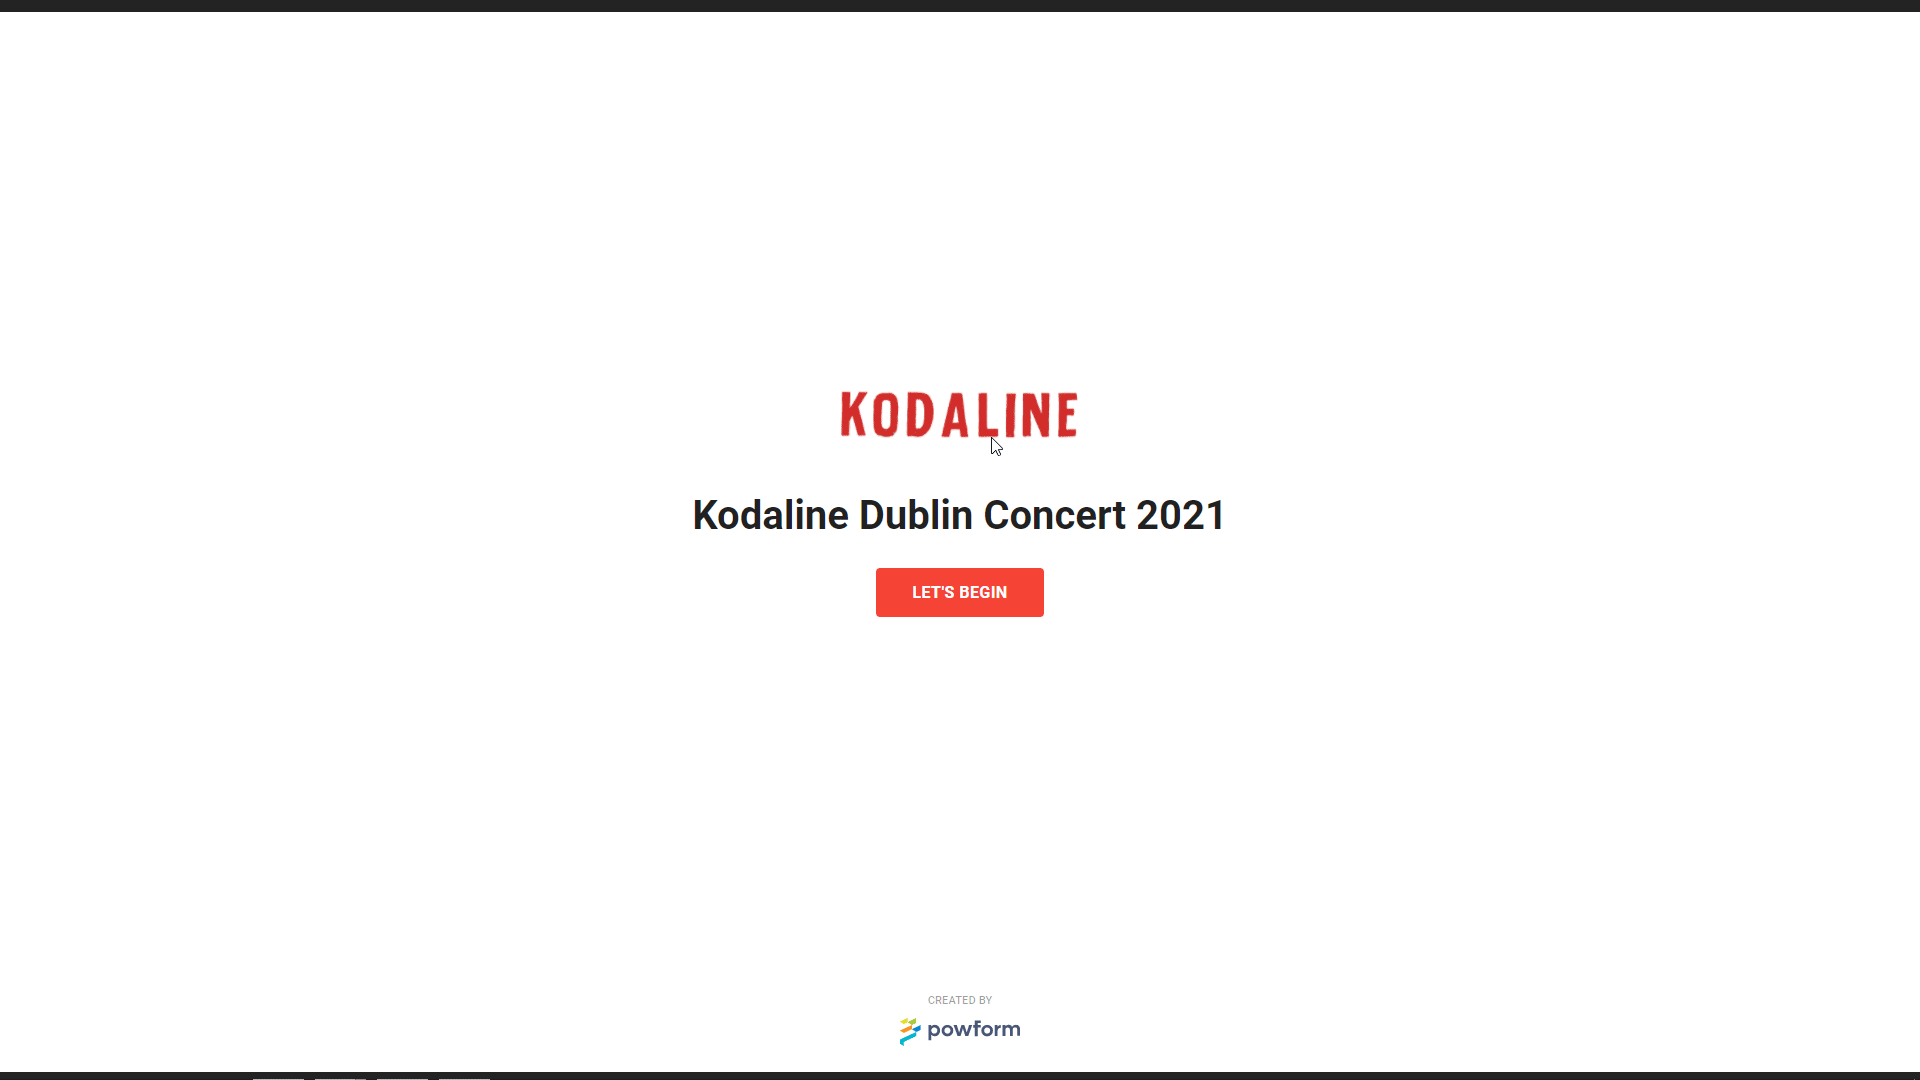
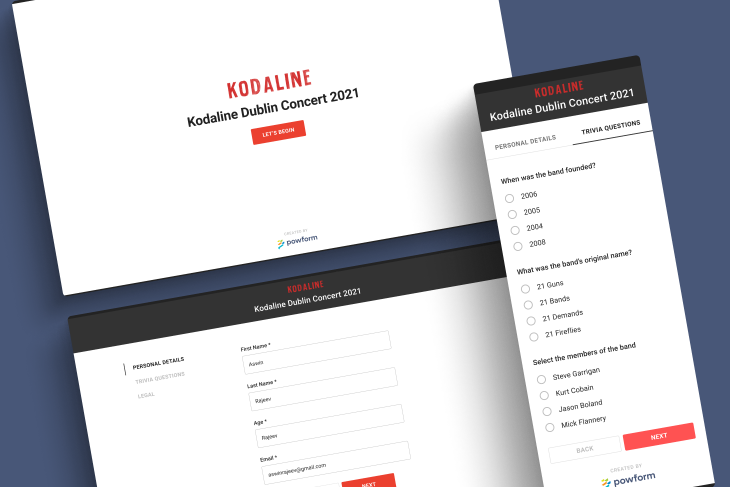
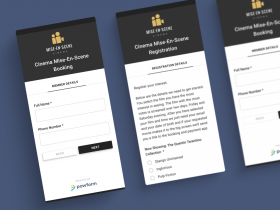
We have completed exporting our branded form-based web application, and it is now available to anyone who has the URL. Take a look at the application above and see just how powerful PowForm really is. The primary and secondary colours have been integrated along with the logo, and the different sections gel perfectly with each other. The same app works well on a mobile device as well, and the URL can be shared on any of the social media platforms to get responses. Check out the mobile view in the demo below. In the subsequent articles, we will take it to the next level by building a complete ecommerce web app solution that accepts in app payments.

Related Articles
Exporting a branded PowForm web app (with payments)
Highly Configurable - No Coding
Build professional and fast branded e-commerce and customer data collection web apps, no coding experience needed. Scalable solutions that can be built and integrated into your business in minutes.
Powform enables you to create branded, interactive, multi-feature apps for mobile and desktop browsers, including all the smart features you need to collect customer data and payments. With the addition of conditional logic you can provide a more tailored experience for your customers.
Our managed secure database allows you to store and analyse all submitted web app data.
Want to store all app data in house?
App submissions can be directed to other business systems via secure authenticated api services.
Contact us today to discuss your custom branded no-code web apps requirements.